The Kochi Jacket is the ideal layering piece for whatever season you're in. The three variations mean you can use any woven fabric from wool to chiffon!
Today we're showing you how to add lining to variation three of our Kochi Jacket. This version features the neckband and let's you play with contrasting fabric.
So, let's get to it.
How to Line Your Kochi Jacket
This tutorial is just showing you how to line variation 3, which has the band along the neckline and centre front, but doesn't include lining. Until now.
You will need 1.8m/2 yards of both outer fabric and lining fabric. If you are sewing a contrast band, you'll also need 25cm/10" of that fabric (if it's cut from a bolt at the fabric store) or if you've been lucky enough to source Kimono fabric, you'll want 1m of that for the band.
For this particular version, I've chosen rayon fabric throughout.
Select pattern pieces numbered 1, 2, 3 and 5.
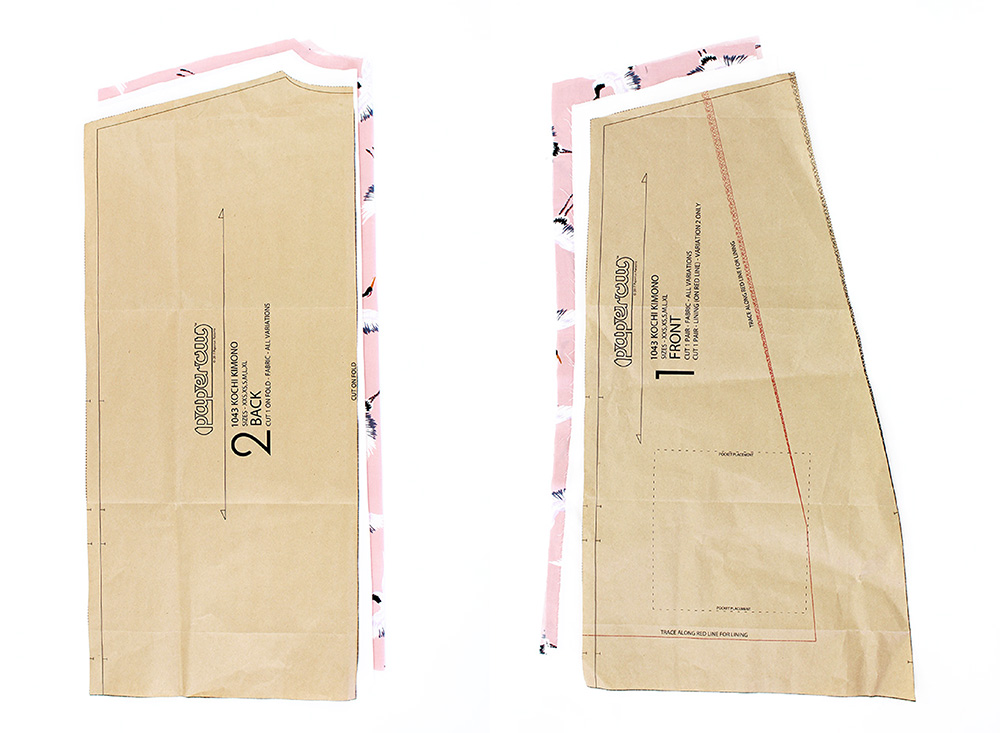
Cut identical front and back pieces in both your lining and outer fabrics (ignoring the red line for 'lining').
Cut your band piece as per the instructions.
For the sleeves, cut your outer fabric as usual and the lining along the red line as marked on the pattern.
You can choose whether or not to finish the edges as explained in step 1. The fusing is optional too, depending on the weight of your fabric and whether or not you think it needs strengthening.
Stitch your front and back pieces together at the shoulders as per step 6. Neaten/serge the edges. Repeat for the lining.
Attach the sleeves as explained in step 7. Repeat for the lining.
Sew sleeves and side seams together as in step 8 (all the way to hem). Repeat for the lining.
So far, you should have identical lining and outer pieces.
Take your lining piece only and trim the bottom hem by 6cm/2.5".
Stitch your band pieces together as per step 11.
Finish the short ends of the band by stitching the end with right sides together. Turn this new corner the right side out and press.
Place your outer and lining kimono pieces together with right sides together. Pin together the bottom hem edge of the outer and lining pieces. Stitch. Remember that we trimmed the lining piece, so don't worry if the rest doesn't line up. Just focus on that bottom edge. Press the seam allowance towards outer fabric.
With right sides of your kimono together, carefully pin your band piece around the neckline (between lining and outer layers) with raw edges matching.
The bottom of your band should match the notch on your front outer pieces (as marked in this photo by the horizontal red pin). The band notches near the centre back seam should also match the shoulder seams.
Carefully stitch around the neckline from one hem to the other.
Turn your kimono to the right side out by pulling the garment through one of your sleeve ends.
Hand stitch your sleeve hems together. There are numerous way to do this, so just do what works for you. I like to match the edges of the hem, fold them inwards and pin them together at the seam allowance.
I then stitch along the seam allowance by doing one long stitch ...
... then turn the needle to do one small stitch backwards.
Repeat that stitch all the way around the hem. Tie off your thread and hide the tail inside the seam allowance.
When you hang your garment, you will see that hems are turned toward the inside for a professional finish. Carefully press your seams and voila!
Congrats on your stunning kimono. Go rock your style!


